Google OAuth 2.0 allows third-party applications to securely connect with Google services and access permitted Google account information without requiring users to share their Google account passwords.
It is commonly used for:
Sign in with Google (Single Sign-On).
Connecting external applications with Google accounts.
To establish this connection, the application administrator must create a Google Cloud Project, configure OAuth consent settings, and generate a Client ID and Client Secret.
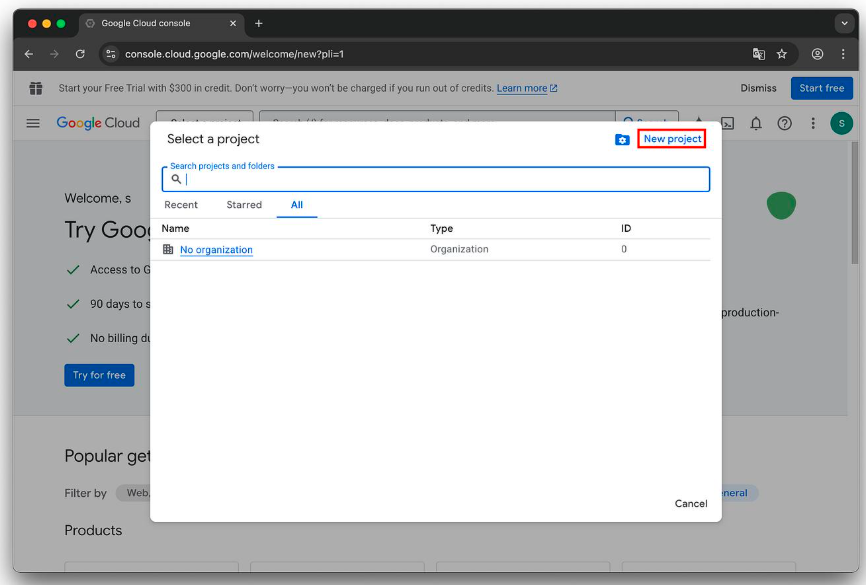
Step 1: Create a Google Cloud Project
Open Google Cloud Console.
Sign in using your Google account.
Click the project selector at the top.
Select New Project.
Enter the project name.
Select the organisation if applicable.
Click Create.
Step 2: Enable the Required Google API
The API depends on the functionality required by the third-party application.
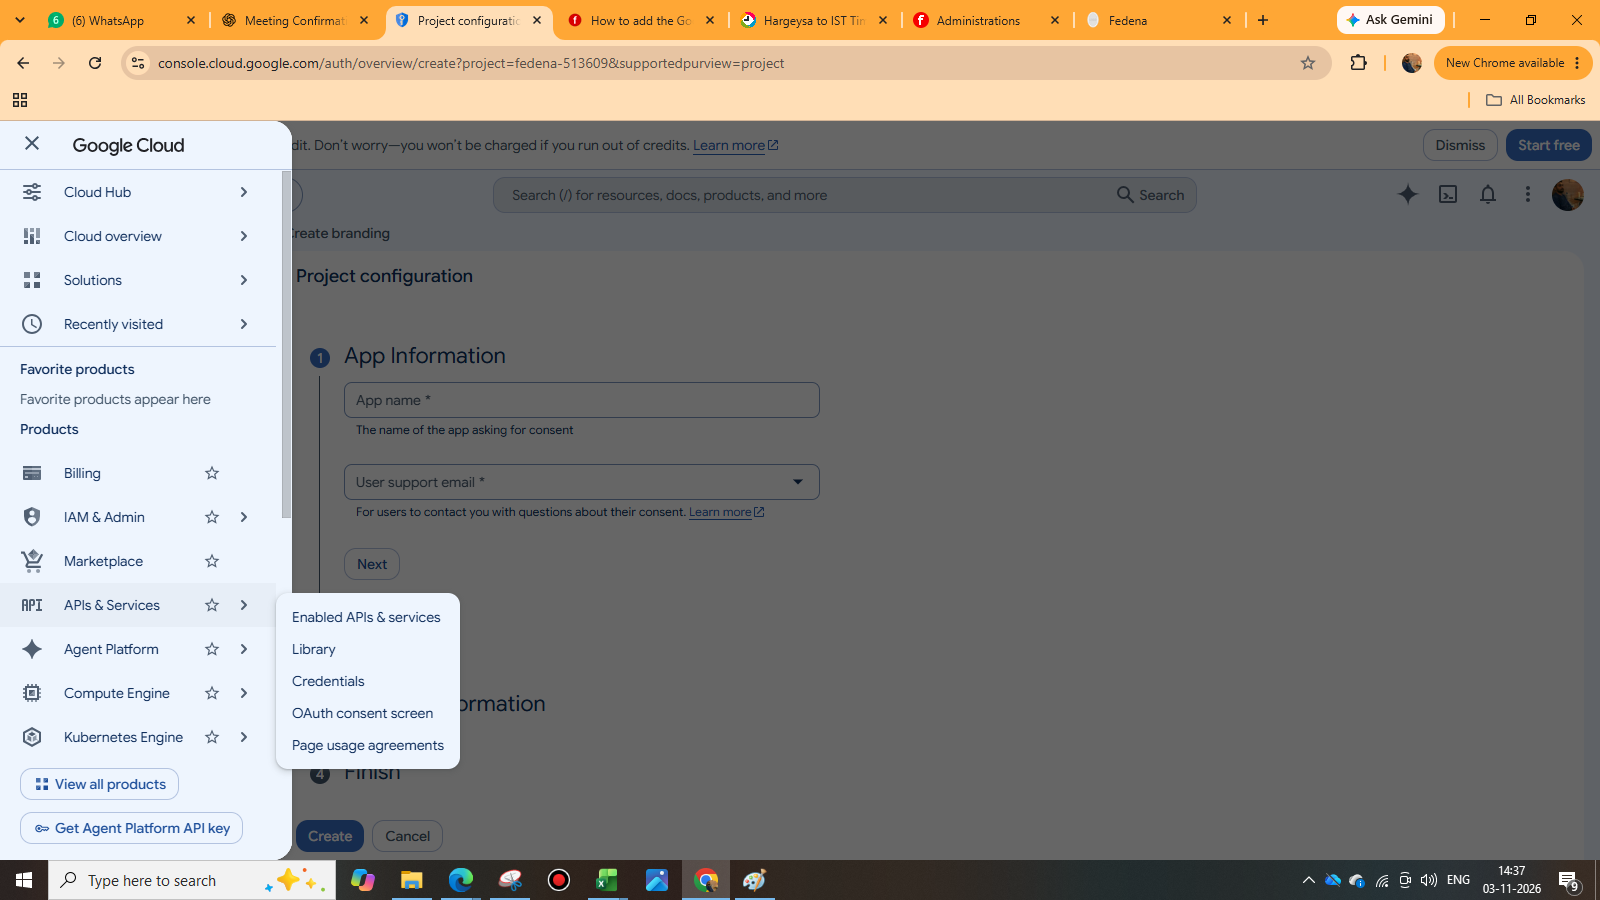
Navigate Menu to APIs & Services → Library.
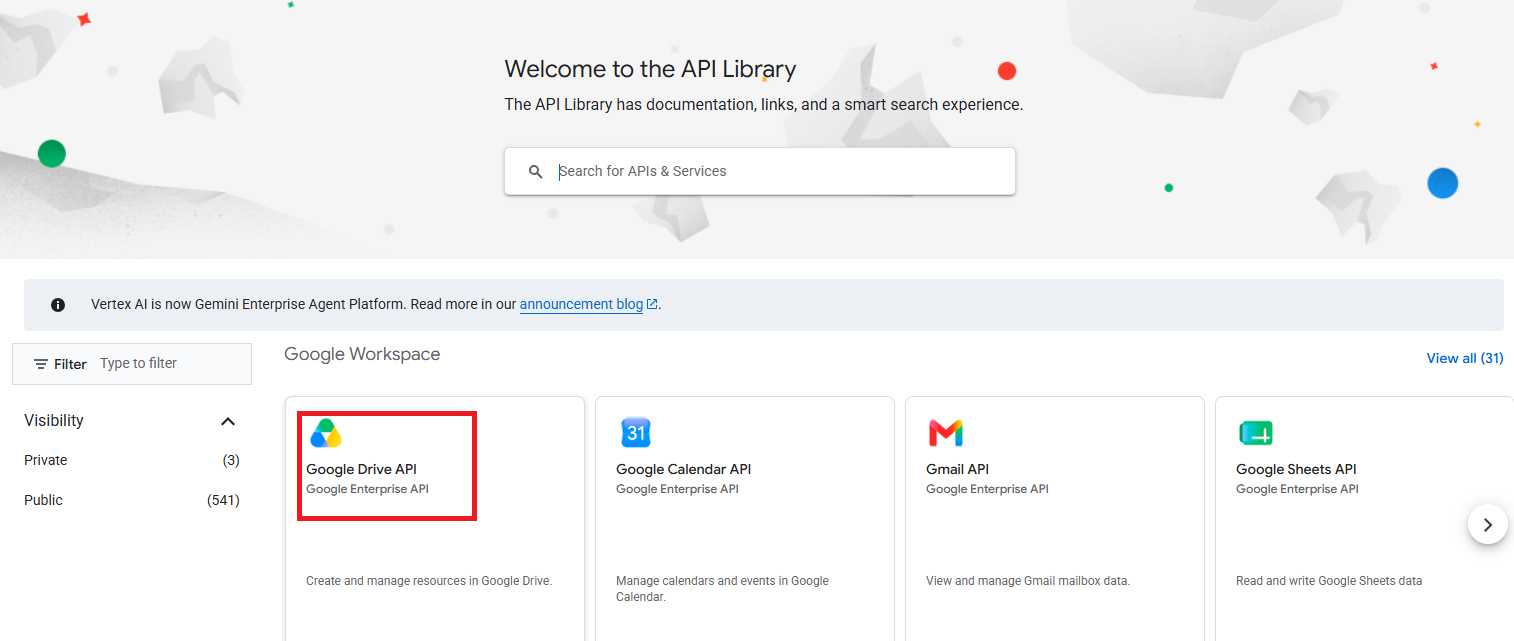
Search for the required API.
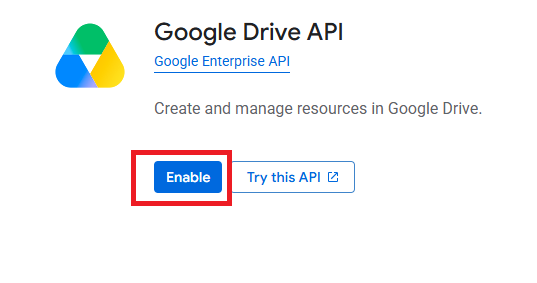
Select the API.
Click Enable.
Step 3: Create OAuth Client Credentials
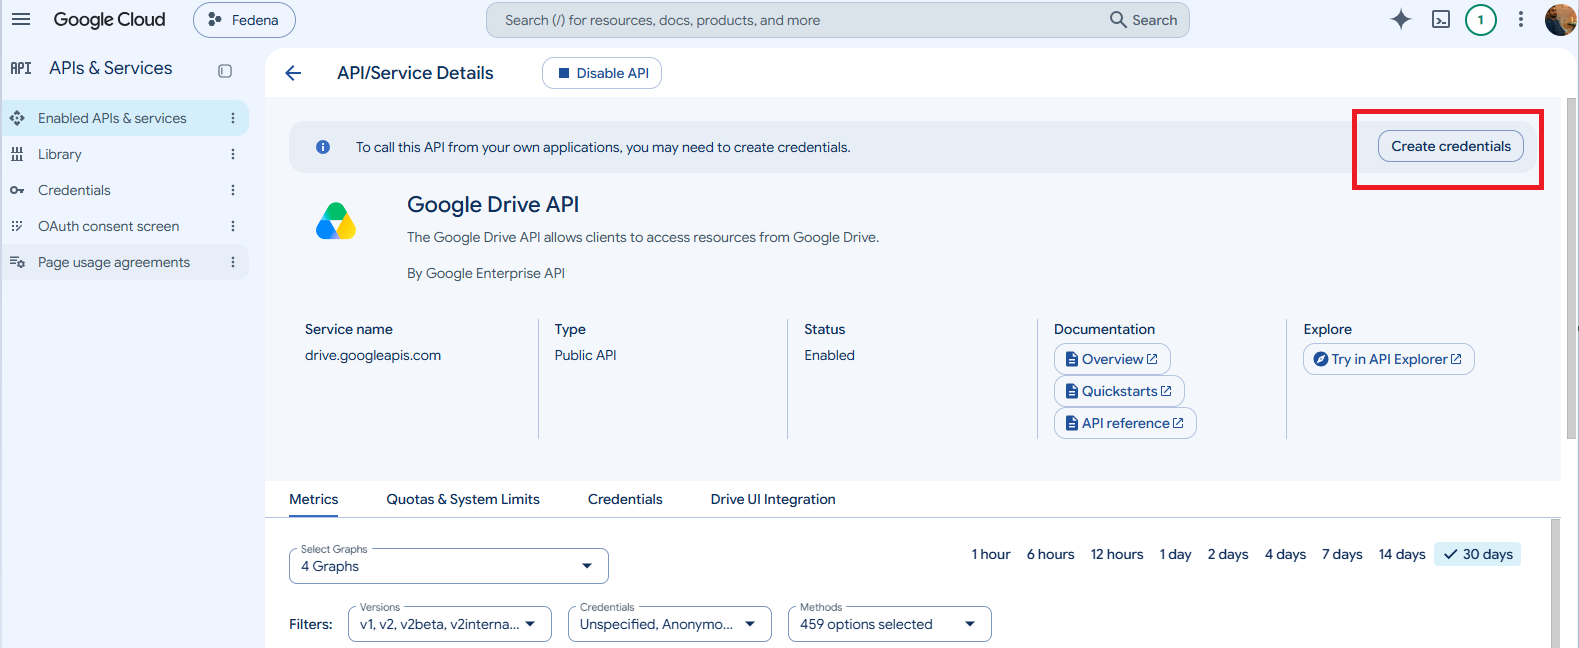
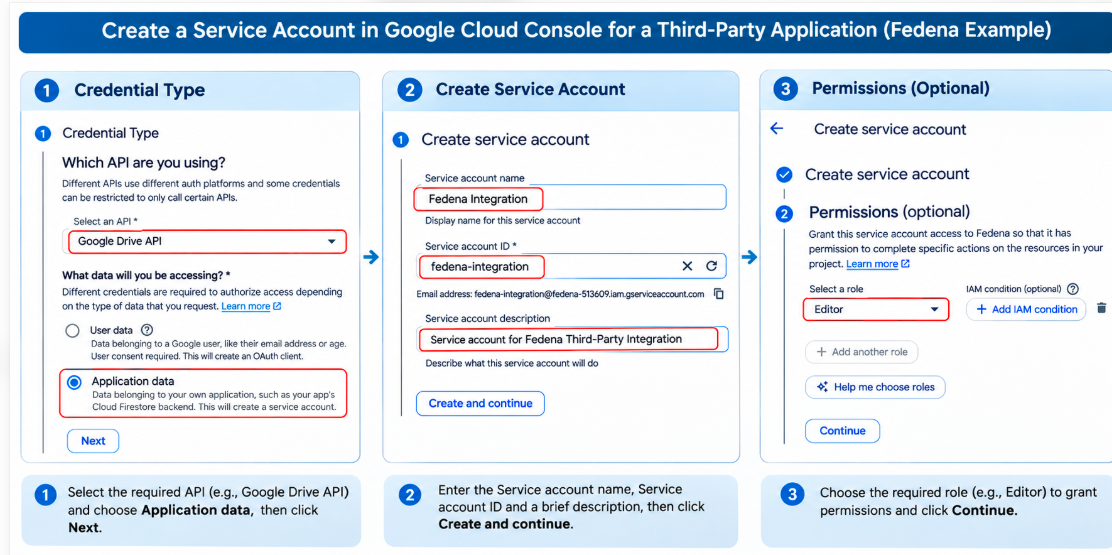
Navigate toAPI's & Services
Click Create credentials.
Step 4: Configure OAuth Consent Screen
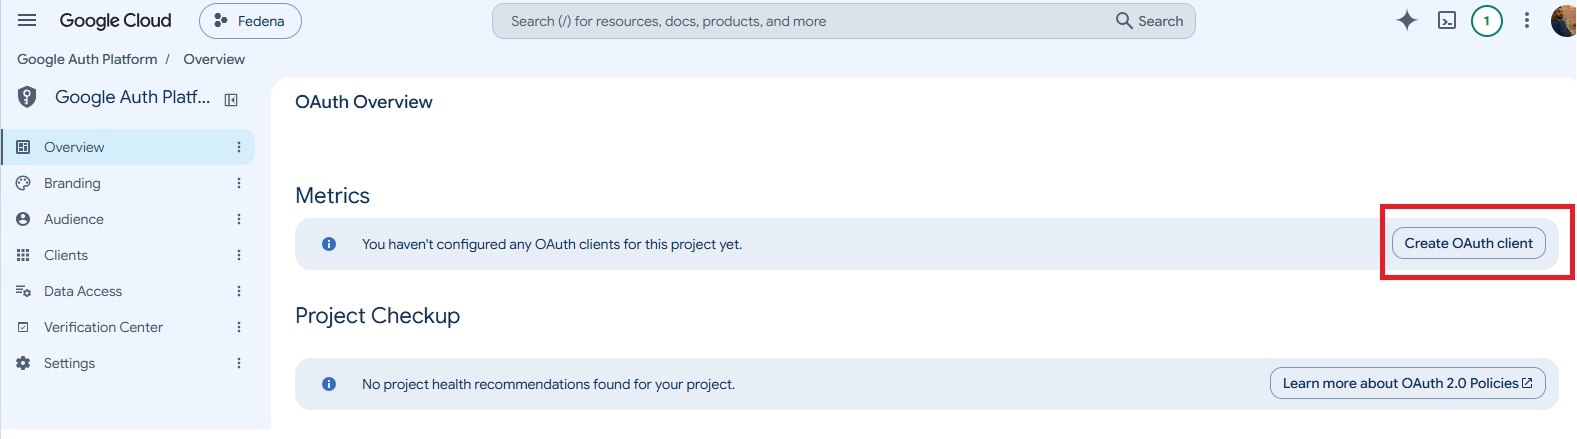
Open Oauth Consent Screen.
Select Get Started, if prompted.
Enter the application details.
Configure the required application branding and contact details.
Save the configuration.
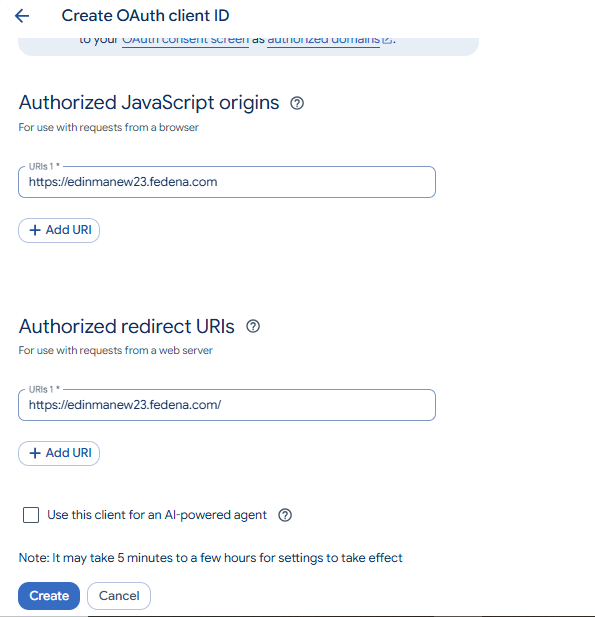
Step 5: Configure Authorized Redirect URI
The redirect URI is the URL to which Google redirects users after authentication.
Locate Authorized Redirect URIs.
Click Add URI(https://your-school-domain/authenticate)
Enter the redirect URL provided by the third-party application.
Click on Create.
NOTE :
Add each school URL separately.
Use the exact domain configured for the respective Fedena instance.
 Step 6: Generate Client ID and Client Secret
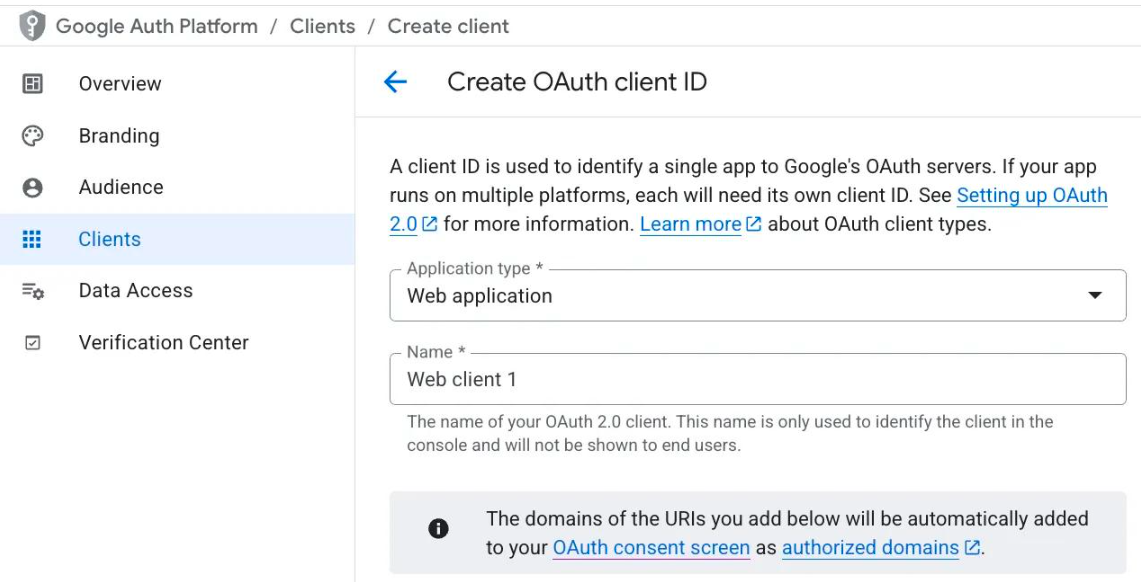
Verify the application type and redirect URLs.
Click Create.
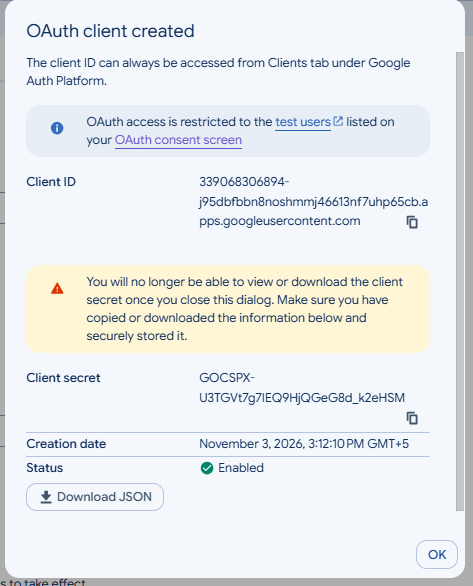
Google will generate the following credentials:
Client ID
Client Secret
Copy both values and store them securely.
Once all the above steps have been completed successfully, follow the steps below to configure the Google OAuth settings in Fedena.
Then login to your accounts.fedena.com account (or your individual saas account).
Click on your username on the top right hand corner to give a drop down menu.
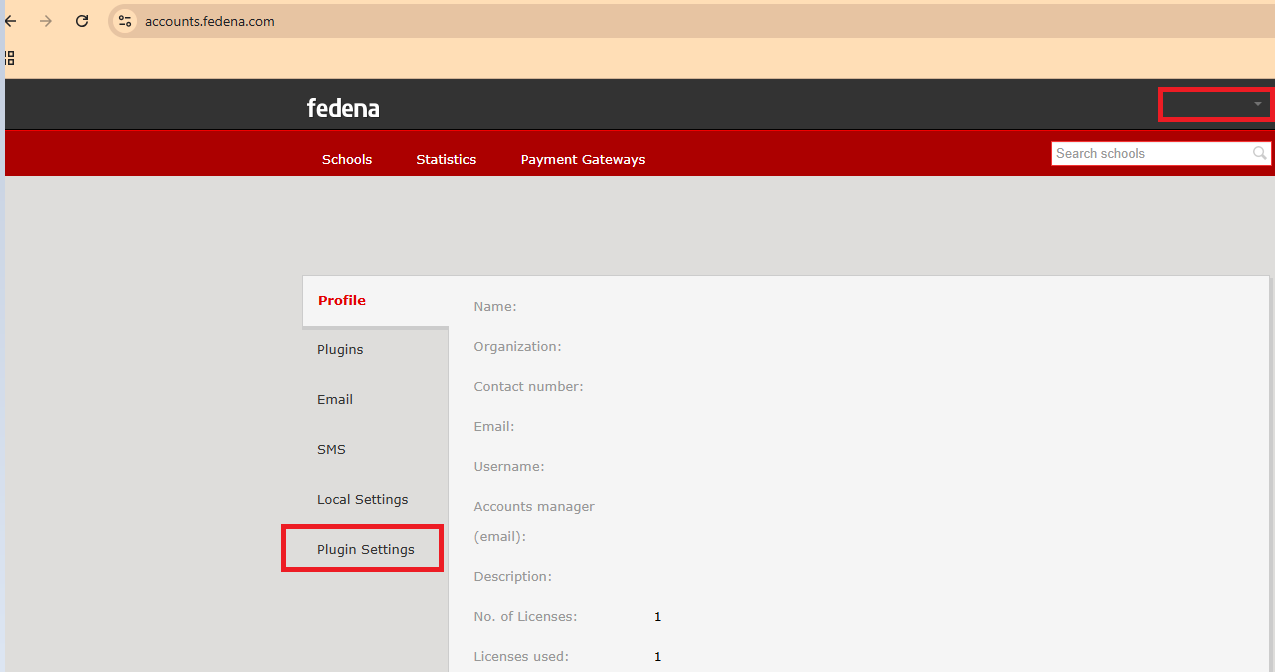
Click on Company. This shows a new page with tabs containing your company information.
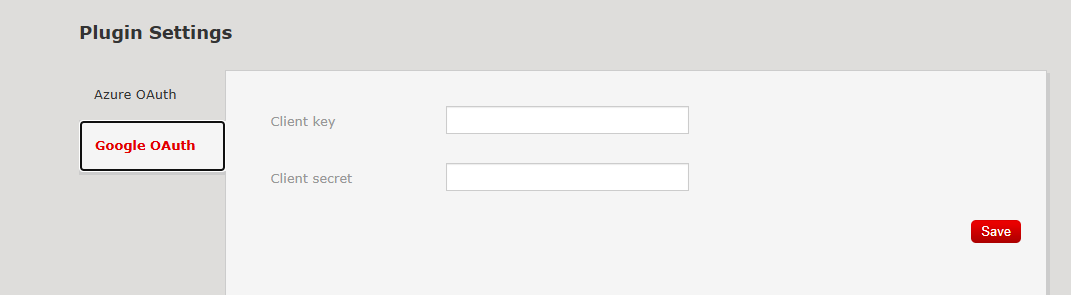
Click on the Plugin settings tab and then click Google OAuth. Enter the Client Key and Client Secret values generated in the step 6 here. Click save to save the values
Now if the GoogleOauth Plugin has been enabled for your school and the check box Enable Oauth has been checked in the General Settings of Fedena, you can login with your google account and view the documents.
Was this article helpful?
That’s Great!
Thank you for your feedback
Sorry! We couldn't be helpful
Thank you for your feedback
Feedback sent
We appreciate your effort and will try to fix the article